01 02 03 Miss Smartie's Sewing: March 2015 04 05 15 16 19 20 21 24 21 24 21 24 21 24 25 26 27 28 29

Miss Smartie's Sewing

30 31 32 36 32 36 32 36 32 36 37 38 body { background:#aba; margin:0; padding:20px 10px; text-align:center; font:x-small/1.5em "Trebuchet MS",Verdana,Arial,Sans-serif; color:#333; font-size/* */:/**/small; font-size: /**/small; } /* Page Structure ----------------------------------------------- */ /* The images which help create rounded corners depend on the following widths and measurements. If you want to change these measurements, the images will also need to change. */ @media all { #content { width:740px; margin:0 auto; text-align:left; } #main { width:485px; float:left; background:#fff url("https://resources.blogblog.com/blogblog/data/rounders/corners_main_bot.gif") no-repeat left bottom; margin:15px 0 0; padding:0 0 10px; color:#000; font-size:97%; line-height:1.5em; } #main2 { float:left; width:100%; background:url("https://resources.blogblog.com/blogblog/data/rounders/corners_main_top.gif") no-repeat left top; padding:10px 0 0; } #main3 { background:url("https://resources.blogblog.com/blogblog/data/rounders/rails_main.gif") repeat-y; padding:0; } #sidebar { width:240px; float:right; margin:15px 0 0; font-size:97%; line-height:1.5em; } } @media handheld { #content { width:90%; } #main { width:100%; float:none; background:#fff; } #main2 { float:none; background:none; } #main3 { background:none; padding:0; } #sidebar { width:100%; float:none; } } /* Links ----------------------------------------------- */ a:link { color:#258; } a:visited { color:#666; } a:hover { color:#c63; } a img { border-width:0; } /* Blog Header ----------------------------------------------- */ @media all { #header { background:#456 url("https://resources.blogblog.com/blogblog/data/rounders/corners_cap_top.gif") no-repeat left top; margin:0 0 0; padding:8px 0 0; color:#fff; } #header div { background:url("https://resources.blogblog.com/blogblog/data/rounders/corners_cap_bot.gif") no-repeat left bottom; padding:0 15px 8px; } } @media handheld { #header { background:#456; } #header div { background:none; } } #blog-title { margin:0; padding:10px 30px 5px; font-size:200%; line-height:1.2em; } #blog-title a { text-decoration:none; color:#fff; } #description { margin:0; padding:5px 30px 10px; font-size:94%; line-height:1.5em; } /* Posts ----------------------------------------------- */ .date-header { margin:0 28px 0 43px; font-size:85%; line-height:2em; text-transform:uppercase; letter-spacing:.2em; color:#357; } .post { margin:.3em 0 25px; padding:0 13px; border:1px dotted #bbb; border-width:1px 0; } .post-title { margin:0; font-size:135%; line-height:1.5em; background:url("https://resources.blogblog.com/blogblog/data/rounders/icon_arrow.gif") no-repeat 10px .5em; display:block; border:1px dotted #bbb; border-width:0 1px 1px; padding:2px 14px 2px 29px; color:#333; } a.title-link, .post-title strong { text-decoration:none; display:block; } a.title-link:hover { background-color:#ded; color:#000; } .post-body { border:1px dotted #bbb; border-width:0 1px 1px; border-bottom-color:#fff; padding:10px 14px 1px 29px; } html>body .post-body { border-bottom-width:0; } .post p { margin:0 0 .75em; } p.post-footer { background:#ded; margin:0; padding:2px 14px 2px 29px; border:1px dotted #bbb; border-width:1px; border-bottom:1px solid #eee; font-size:100%; line-height:1.5em; color:#666; text-align:right; } html>body p.post-footer { border-bottom-color:transparent; } p.post-footer em { display:block; float:left; text-align:left; font-style:normal; } a.comment-link { /* IE5.0/Win doesn't apply padding to inline elements, so we hide these two declarations from it */ background/* */:/**/url("https://resources.blogblog.com/blogblog/data/rounders/icon_comment.gif") no-repeat 0 45%; padding-left:14px; } html>body a.comment-link { /* Respecified, for IE5/Mac's benefit */ background:url("https://resources.blogblog.com/blogblog/data/rounders/icon_comment.gif") no-repeat 0 45%; padding-left:14px; } .post img { margin:0 0 5px 0; padding:4px; border:1px solid #ccc; } blockquote { margin:.75em 0; border:1px dotted #ccc; border-width:1px 0; padding:5px 15px; color:#666; } .post blockquote p { margin:.5em 0; } /* Comments ----------------------------------------------- */ #comments { margin:-25px 13px 0; border:1px dotted #ccc; border-width:0 1px 1px; padding:20px 0 15px 0; } #comments h4 { margin:0 0 10px; padding:0 14px 2px 29px; border-bottom:1px dotted #ccc; font-size:120%; line-height:1.4em; color:#333; } #comments-block { margin:0 15px 0 9px; } .comment-data { background:url("https://resources.blogblog.com/blogblog/data/rounders/icon_comment.gif") no-repeat 2px .3em; margin:.5em 0; padding:0 0 0 20px; color:#666; } .comment-poster { font-weight:bold; } .comment-body { margin:0 0 1.25em; padding:0 0 0 20px; } .comment-body p { margin:0 0 .5em; } .comment-timestamp { margin:0 0 .5em; padding:0 0 .75em 20px; color:#666; } .comment-timestamp a:link { color:#666; } .deleted-comment { font-style:italic; color:gray; } .paging-control-container { float: right; margin: 0px 6px 0px 0px; font-size: 80%; } .unneeded-paging-control { visibility: hidden; } /* Profile ----------------------------------------------- */ @media all { #profile-container { background:#cdc url("https://resources.blogblog.com/blogblog/data/rounders/corners_prof_bot.gif") no-repeat left bottom; margin:0 0 15px; padding:0 0 10px; color:#345; } #profile-container h2 { background:url("https://resources.blogblog.com/blogblog/data/rounders/corners_prof_top.gif") no-repeat left top; padding:10px 15px .2em; margin:0; border-width:0; font-size:115%; line-height:1.5em; color:#234; } } @media handheld { #profile-container { background:#cdc; } #profile-container h2 { background:none; } } .profile-datablock { margin:0 15px .5em; border-top:1px dotted #aba; padding-top:8px; } .profile-img {display:inline;} .profile-img img { float:left; margin:0 10px 5px 0; border:4px solid #fff; } .profile-data strong { display:block; } #profile-container p { margin:0 15px .5em; } #profile-container .profile-textblock { clear:left; } #profile-container a { color:#258; } .profile-link a { background:url("https://resources.blogblog.com/blogblog/data/rounders/icon_profile.gif") no-repeat 0 .1em; padding-left:15px; font-weight:bold; } ul.profile-datablock { list-style-type:none; } /* Sidebar Boxes ----------------------------------------------- */ @media all { .box { background:#fff url("https://resources.blogblog.com/blogblog/data/rounders/corners_side_top.gif") no-repeat left top; margin:0 0 15px; padding:10px 0 0; color:#666; } .box2 { background:url("https://resources.blogblog.com/blogblog/data/rounders/corners_side_bot.gif") no-repeat left bottom; padding:0 13px 8px; } } @media handheld { .box { background:#fff; } .box2 { background:none; } } .sidebar-title { margin:0; padding:0 0 .2em; border-bottom:1px dotted #9b9; font-size:115%; line-height:1.5em; color:#333; } .box ul { margin:.5em 0 1.25em; padding:0 0px; list-style:none; } .box ul li { background:url("https://resources.blogblog.com/blogblog/data/rounders/icon_arrow_sm.gif") no-repeat 2px .25em; margin:0; padding:0 0 3px 16px; margin-bottom:3px; border-bottom:1px dotted #eee; line-height:1.4em; } .box p { margin:0 0 .6em; } /* Footer ----------------------------------------------- */ #footer { clear:both; margin:0; padding:15px 0 0; } @media all { #footer div { background:#456 url("https://resources.blogblog.com/blogblog/data/rounders/corners_cap_top.gif") no-repeat left top; padding:8px 0 0; color:#fff; } #footer div div { background:url("https://resources.blogblog.com/blogblog/data/rounders/corners_cap_bot.gif") no-repeat left bottom; padding:0 15px 8px; } } @media handheld { #footer div { background:#456; } #footer div div { background:none; } } #footer hr {display:none;} #footer p {margin:0;} #footer a {color:#fff;} /* Feeds ----------------------------------------------- */ #blogfeeds { } #postfeeds { padding:0 15px 0; }

Sunday 8 March 2015

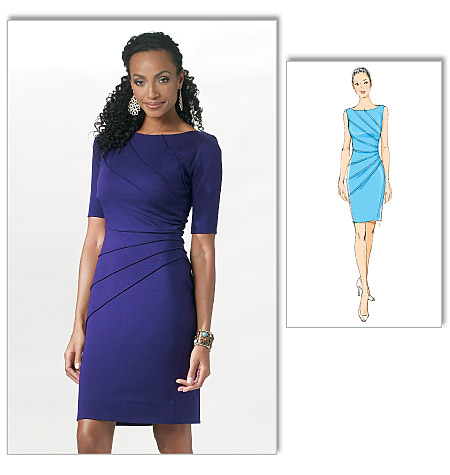
Owlsome Summer Dress


 The project I've blogged about last week has been finished. I couldn't wait to wear this dress, so I had to sew obsessively until it was done. I had the chance today to wear it out at the zoo, since it was a freakishly warm and sunny winters day, I bullied my boyfriend to take pictures for me and here we are! It really felt like spring and I loved it! This dress has everything you would want in a fantastic summers dress, It's cute (owls), practical (pockets!), flattering and swirls around very nicely. The skirt would be perfect for a rock and roll dancing or a pick nick. The bodice is really deeply cut, but the gathered cups keep everything nice and modest.

This summer dress has a circle skirt and contrasting halter straps. The bodice is close fitting and features some gathers witch will make your breasts seam larger when they are small like mine.
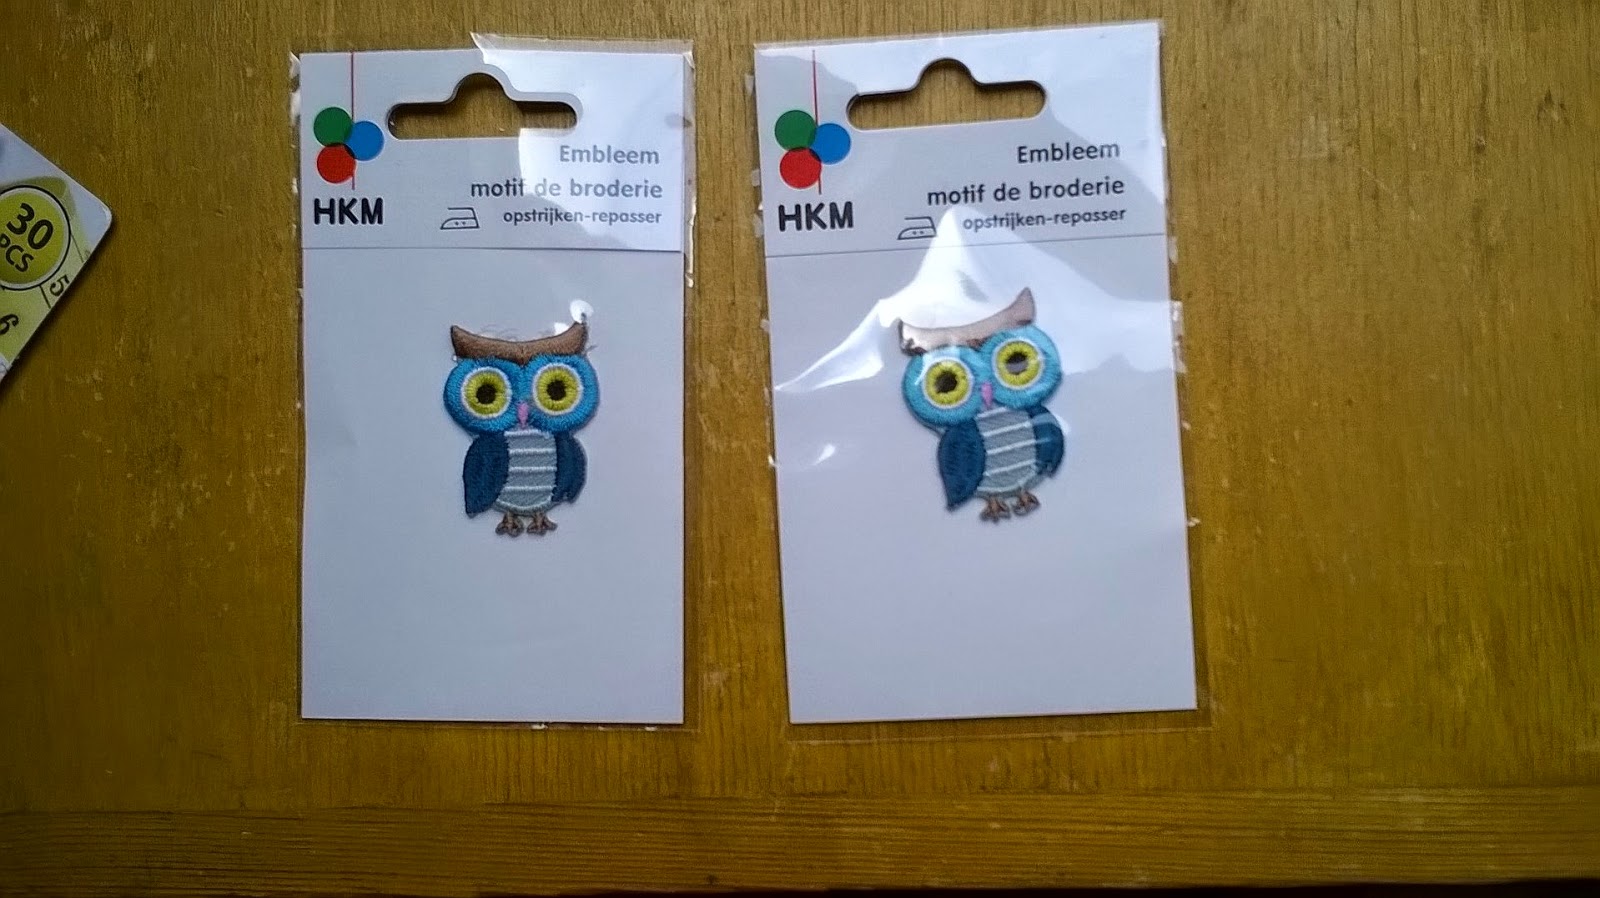
I love the contrasting fabrics on the halter piece but I have been putting of the decision witch contrast fabric to use. In the end I went for a leftover fabric I already had in my stash and made my own owl decorations as you can read in my post on customising fabric. I felt that the contrast was not used enough witch left the design unbalanced, so I added another part in that fabric.

Since I'm already boasting about my fabric customisation, I LOVE my owl fabric. I think It really makes the dress more festive and fit for summer. (and It's not even spring here yet). I'm very happy with how this turned out. I was really afraid that it would look sloppy or very irregular. Instead the owls all get a unique character and I could strategically place my designs to make pattern matching easier. Or at least in theory. I ended up miscalculating a couple of times, but I still think It looks nice and anyway, hand painting your fabric makes you think twice about re cutting pieces.


I also love the design witch I think really suits my figure. It enhances both my hips and breasts and emphasises my waist. Since I'm a bit of a rectangle, I'm always grateful for clothes that make me look as if I've got real curves.  I did not have to make any pattern alterations for fit but I did end up overlapping the halter pieces several cm. I might have made them slightly to tight but this stopped the bodice from gaping and helped with modesty coverage. This is probably down to my relatively small breasts.

Oh and a plus for pockets!

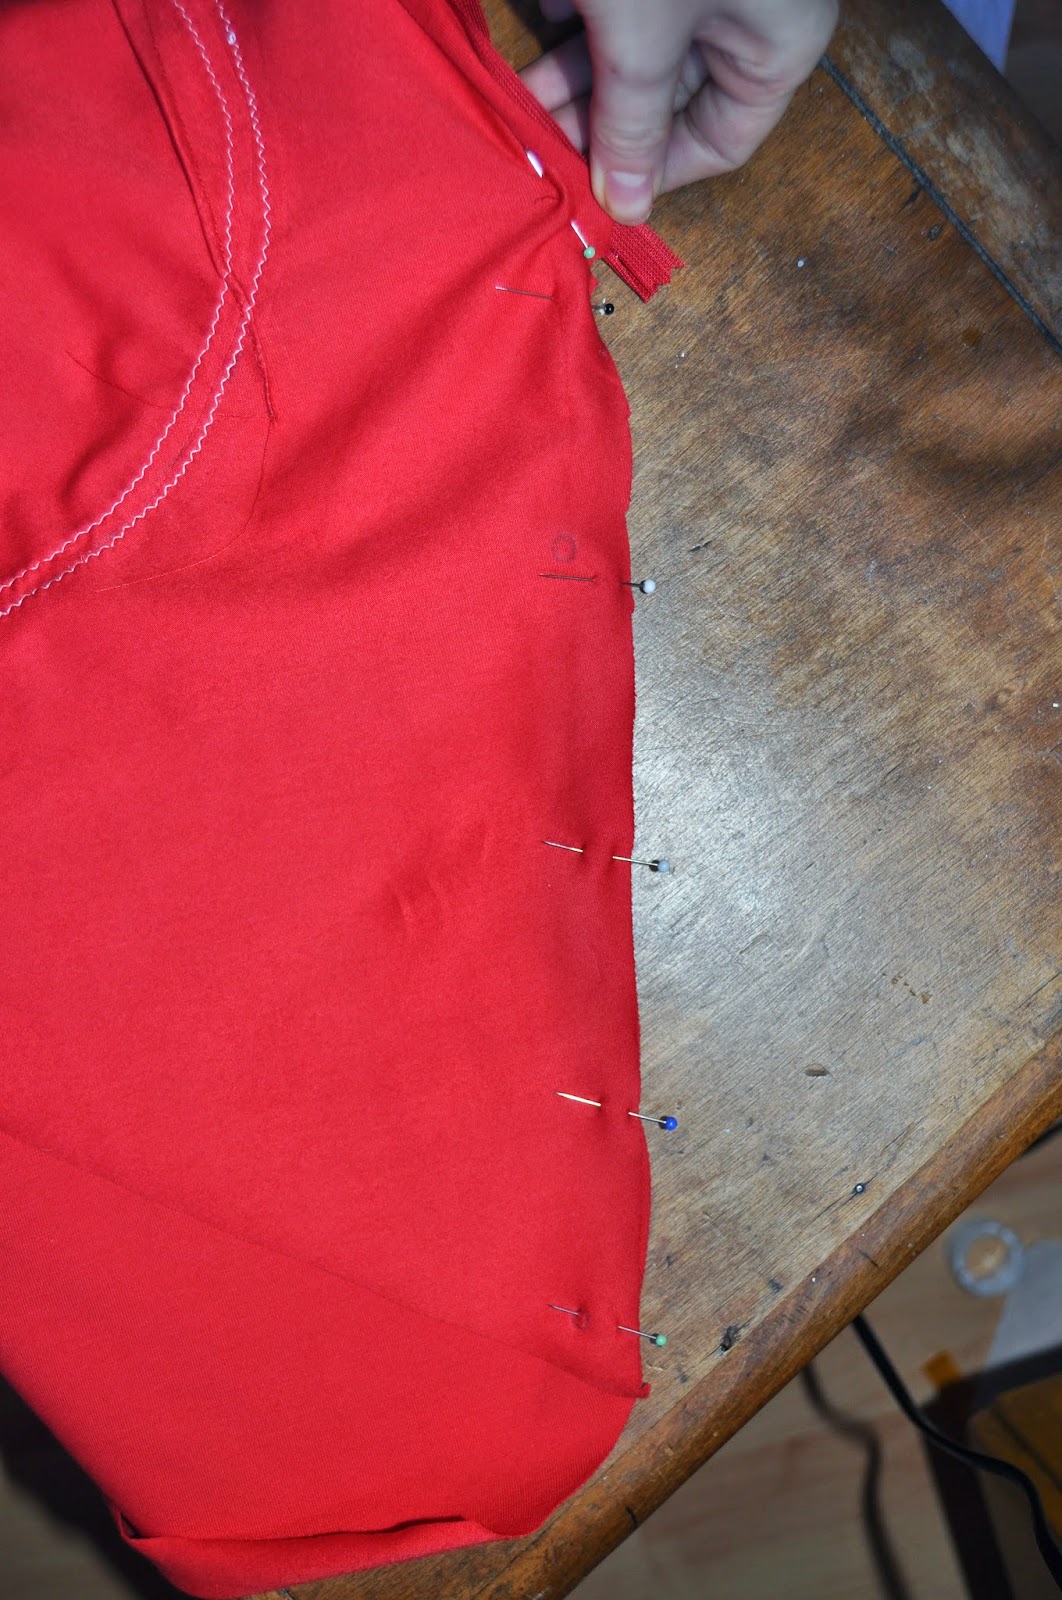
dress inside out, click to enlarge
I also love the finished look the lined bodice has. I use a lot of facings and they never give such a clean finish. It involves a bit of extra work and a lot of extra fabric. But I think the result is worth it. To match this clean finish I tried out hong kong seams and a hong kong hem. I made some biasband from my contrast fabic for the seams and just sewed that on instead of zigzagging the whole piece. Sewing the seam together after went like a breeze. I really liked the finished look and I thought the amount of extra work was reasonable.
I did not have such a fine experience with the hong kong hem though. The pattern calles for a narrow hem of 1.5 cm and I already shortened my dress quite a bit. I did not want it to get much shorter. I cut out more than 3m of bias strips (with a width of 2.5 cm) and sewed them together. Then I sewed it to the hemline. Then I had to turn the strip in twice and turn the hem up 1 cm. This was very fidley work and turned out very time consuming. I also have the feeling that I did something wrong since the hem doesn't seam to flow properly. The result does look nice on the inside though. I'm going to try it with wider strips on a wider hem next time to asses whether this technique is always as tiresome.

If you are thinking of making this dress yourself beware of the pattern label. It's marked easy but some of the techniques are more for the experienced sewer and are not explained at all in the instructions. I'm talking about inserting the bodice into the halter pieces. This has to be done really neatly to give the dress a crisp finish. All other parts of the process are explained adequately though. If you are really determined there are always lots of amazing you tube technique video's to take you through the process...

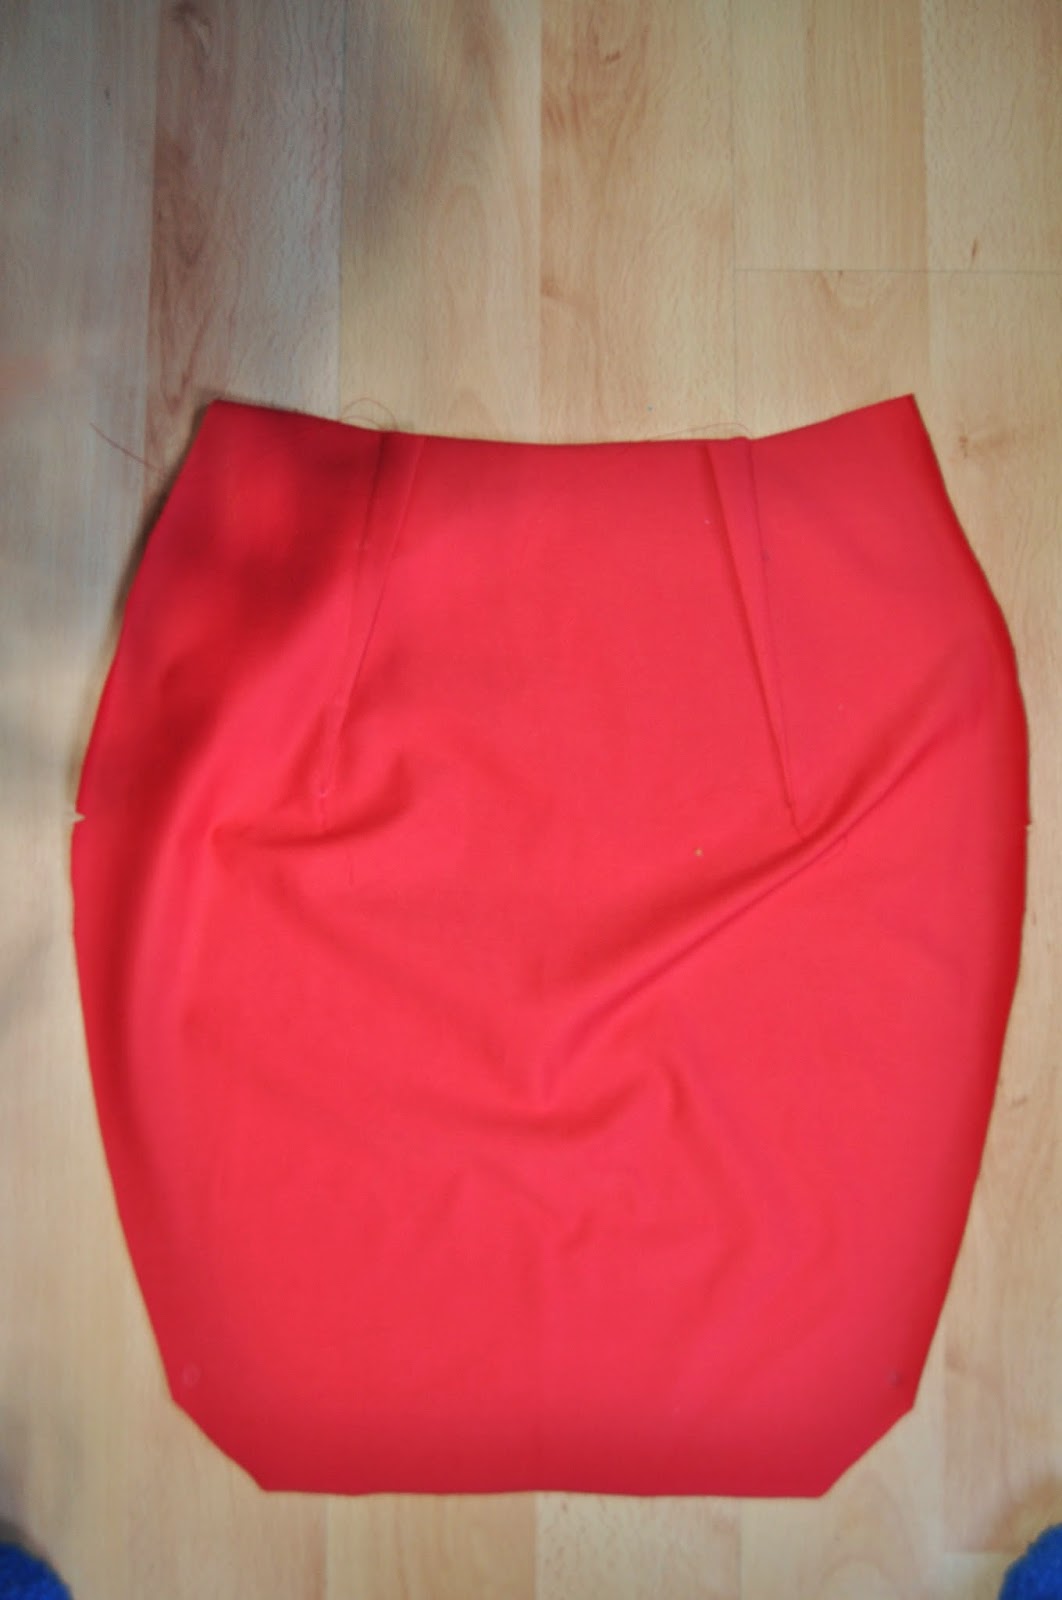
I also spotted some missing pattern marks (or I might have overlooked them) on the back seam of the skirt. nothing too important though. The notch in the pocket is also in the wrong place according to me, just align the top of the pocket with the top of the skirt like in the picture and you should be fine though.

To sum things up:

I'm in love with the result. I learnt new techniques (although I broke two needles in the process). I have owls on my dress. I made a matching hair bow. In short this was a good experience. The pattern comes together fine and if you are willing to dare the rather advanced process of sewing in contrasting pieces, this dress is for you. Just be prepared to give it a couple of tries. The fabric pieces will mould together in the end. The result is certainly worth the trouble. I'm really in love with this dress at the moment and I would love to have another, I might make another view but I have agreed on sewing a large number of dresses for other people in the near future though so there will be next to no sewing for myself until June.


Labels: , , ,

Thursday 5 March 2015

The Little Tucked Dress

A while ago I was looking for patterns that would suit my figure. I usually look good in clothes that fit tightly since I'm so thin, but on the other hand, tight clothes sometimes make me look like I haven't got any curves. Not this pattern. Oh no.

I was looking through sewing pattern review when I noticed it, an intriguing, simple stile, made up by lots of different people but always with amazing results. hugging the right places and drawing the eye in a very flattering way, on everyone. the look is also casual enough for work, or just about anything, but still so sexy that you will definitely turn some heads. It can be dressed up or down with accessories to your liking. It's like a little tucked dress, everyone should have one!

Ok, enough raving enthusiasm. The pattern I'm talking about is Butterick 5559. Its a close fitting dress made out of a strech fabric of your liking. It has some very nice sunburst pleats that make the look stand out. The lines of the dress are really simplistic, a swallow boat neck and the option for a sleeved or sleeveless version.

since the design features such prominent tucks I was  a bit nervous about doing them. I had never done anything like that before. Previous reviews told me to take especial care while marking the lines. sewing them turned out to be surprisingly simple. I marked all lines with carbon paper and transferred the lines with pins to the good side of the fabric. Matching up the pins meant matching up the lines. then it was just a matter of carefully sewing down every tuck. I didn't need any additional explanations besides what was already in the pattern, so that's a surprising change. I sewed the whole dress in little over a day, cutting included so this dress came together fabulously easy for me. the hardest part was definitely getting the tucks to line up in the side seam. It took some tries especially for the waist tuck, but I finally got it almost right. Good enough for me :)

I used a stretch knit for this project. It has a weird kind of creases in it, witch I don't really like and feels velvety on one side. It's very comfortable and warm and hides all imperfections. It was a lucky find on a discount shelve so I have no idea what kind of fabric it actually is.

I didn't have to make a single adjustment for this pattern. No need to change perfection, wouldn't have known how to deal with changing the tucks and darts on this one anyway ;). Well actually I might have tampered with the hem length. In the end I just left my dress unhemmed, but I can't remember whether I had planned to shorten it or not.

To conclude:
This pattern seems to never disappoint. It was easy to make and the result is pretty nice. It's a shame that the pattern has been discontinued recently. If you get the chance to grab your own, do so you won't regret it.
Personally I would already love to have a second version in a more neutral colour, maybe gray. It feels super comfortable on and I have gotten lots of compliments with this dress. It's really not such a complicated design as it appears to be.
And the design is just perfect, I love the tucks as they give the dress a very distinguished look. I'd also seen lots of reviews of this pattern and every single dress looked stunning. Also I love the hidden darts. It felt like cheating hiding them in the tucks. Dresses like this are generally flattering for my figure but this dress has a huge wow factor. It somehow enhances everything that needs to be enhanced and magically looks awesome on everyone!

Some more pictures:


Labels: ,

Monday 2 March 2015

Fabric Customisation

I'm officially in love with the fabric I cooked up for my latest project!

I used to use fabric paint all the time to customise my ready to wear clothes but forgot almost all about it when I started to make my own. I've recently rediscovered this and I'm absolutely raving about the possibility to make my own unique designs!

I got the idea for this fabric while looking for inspiration for the perfect fabric match for my newest project. I stumbled across this very cute owl appliqué witch happened to have the colour of one of the fabric matches I was considering and I thought it would look cute on the dress together. I then got the craziest idea to create contrasting owls on the contrasting fabric pieces too.

To make this fabric I I traced the lines of the original appliqué I had on a plastic and cut out a template so I could easily paint a lot of these owls. I used gold, and green-blueish tints to make them. You can see the template in the picture below and owls in various stages of completion too. The trick is to use different layers of different colours to make up one design.

It took a lot of headaches and reverse fabric matching thinking to decide where all of these owls should go, since I did them directly on the pattern pieces I would be cutting out, but I think I did it! I drew the stitching lines on the good side of the fabric in chalk to match up the owls as efficiently as I could and I also drew up a matching aid on my dee through template to make sure I painted the owls on perpendicular to each other. I must say I'm very pleased with the result. The owls turned out cute, all of them unique since they were done by hand and O got to lazy to match them up perfectly witch gives them all their own personality.


I did almost ruin my fabric by following the instructions to fixate the paint. They wanted me to put the fabric in the oven for ten minutes. This luckily only resulted in a small piece of fabric witch came out slightly melted. Remind me to buy some decent cotton fabrics for once...

Sneak peak at the dress I'm constructing:


Also I've discovered the Hong Kong finish, experimenting with that too!


Labels: , , ,

The Heartskirt: construction

cutting the pieces

All pieces are cut on the fold. This gives for a rather unusual cutting plan: first fold over your fabric the width of the front pattern piece. Put both front and back skirt pieces on the fold and cut them out. fold over your fabric again to the width of the godet piece. Cut this out. Fold over again to the width of the back facing. Cut out back and front facings with this piece.

Cut a strips of 6 cm by your fabric width for the ruffle You should have a little over 3 meters of ruffle for all sizes. stitch these strips together.

Transfer all markings

Transfer all pattern markings with your preffered method.

Interfacing and painting the fabric

1. Cut some stretch interfacing to fit your back and front facing pieces. Fuse these in place.

2. Paint dots on the ruffle pieces using fabric paint and a cotton swab (like the ones used to clean your ears). Put the dots spaced out evenly, you can choose their densety yourself. putting straigt lines of dots in one go will help you put them evenly.

Let these dots dry. Iron the painted fabric one minute to fix it or follow the instructions of your specific paint.


Construction


1 Close all darts in the front and back skirt pieces. Press them toward the center of your skirt.


2. Transfer the heart marking to the front of the skirt using pins (first picture), pin a ribbon to the fabric using these pins as a guide turning it in in the beginning and in the end to prevent fraying (second picture), check placement and symmetry (last picture). Stitch in place using a straight stitch.


3. Put in the invisible zipper: press seam allowance on the left sideseam to the inside marking the placement of the zipper. Pin the zipper in matching the teeth with the pressed line putting the zipper on the good side of the fabric. (second picture) Stich with a special pressurefoot.


repeat this for the second zipper 'leg'. pin the rest of the sideseam and stich this like you would with a regular seam.

4. Stich other sideseam. This is a good time to try the skirt on for fit if you need to take in the sideseams a bit it'll be easier to correct it now than later.


5. Pin the godet in place. Make sure the circles are matching. The notches on the godet piece should match the side seams. Stitch in one continuous line pivoting at the circle.

6. Stich right sideseam of facing, leaving the left seam open to finish at the zipper.

7. Stich the top of the facing to the top of the skirt. turn facing to inside and press.

8. Hand stitch facing to darts, under stitch at side seams and whipstitch facing down around the zipper.

9. Gather the ruffle pieces using a basting stitch. These should already be stitched together at this point. You will have to pull stitches at intervals to be able to gather this evenly. Start pinning to the skirt, ajust gathering where necessary. Stitch in place.